Monday, September 12, 2011

Best Homemade Flour Tortillas

Yesterday we had homemade bean burritos... with homemade beans, rice, and ever so yummy homemade flour tortillas (thank you to my friend for making these tortillas, they really made the meal amazingly good.)! If you haven't ever made your own homemade tortillas now is the time!  A month or so ago I decided to make my own tortillas, I tried several different recipes and all fell short except for this one my friends suggested. (Thank you Robyn and Ana for giving me this recipe!!)  The recipe comes from Rick Bayless's website.  The recipe is pretty simple and easy.  Here is the all so fabulous recipe!


Flour Tortillas

Flour Tortillas

Tortillas de Harina
Makes 12 tortillas
Recipe from the Authentic Mexican Cookbook 

INGREDIENTS

3/4 pound (2 3/4 cups) all-purpose flour, plus a little extra for rolling the tortillas
5 tablespoons lard or vegetable shortening, or a mixture of the two
3/4 teaspoon salt
about 3/4 cup very warm tap water

DIRECTIONS

1.   Make the dough.  Combine the flour and fat in a large mixing bowl, working in the fat with your fingers, until completely incorporated.  Dissolve the salt in the water, pour about 2/3 cup of it over the dry ingredients and immediately work it in with a fork; the dough will be in large clumps rather than a homogeneous mass.  If all the dry ingredients haven't been dampened, add the rest of the liquid (plus a little more, if necessary).  Scoop the dough onto your work surface and knead until smooth.  It should be medium-stiff consistency -- definitely not firm, but not quite as soft as most bread dough either.


2.   Rest the dough.  Divide the dough into 12 portions and roll each into a ball.  Set them on a plate, cover with plastic wrap and let rest at least 30 minutes (to make the dough less springy, easier to roll).


3.   Roll and griddle-bake the tortillas.  Heat an ungreased griddle or heavy skillet over medium to medium-high heat.


On a lightly floured surface, roll out a portion of the dough into an even 7-inch circle:  Flatten a ball of dough, flour it, then roll forward and back across it; rotate a sixth of a turn and roll forward and back again; continue rotating and rolling until you reach a 7-inch circle, lightly flouring the tortilla and work surface from time to time.
Lay the tortilla on the hot griddle (you should hear a faint sizzle and see an almost immediate bubbling across the surface).  After 30 to 45 seconds, when there are browned splotches underneath, flip it over.  Bake 30 to 45 seconds more, until the other side is browned; don't overbake the tortilla or it will become crisp.  Remove and wrap in a cloth napkin placed in a tortilla warmer.  Roll and griddle-bake the remaining tortillas in the same manner and stacking them one on top of the other. 

Thursday, September 8, 2011

Homemade Sausage McMuffin with Egg

I mentioned in my last post it was my hubby's birthday...well for every one his birthdays and for father's day I make him his absolute favorite breakfast.... which is homemade Sausage McMuffin with Egg.  I used to stop by McDonald's but then I decided making them at home well....
1st they would taste better
2nd  they be a lot cheaper.

Here is my little recipe!

1 package of Farmer John's sausage patties
1 package of English muffins
American cheese slices....or whatever kind of cheese you want to use
Salt and Pepper to taste
A few Ice cubes
A few Mason Quart Jar Lids or egg rings....I have heard of using tuna cans with the top and bottom taken off.
Breakfast-sausage_original-sausage-patties_low-fat-12oz


Pat out the patties a little thinner to match the size of the English muffin, and cook according to package.

Now with the eggs, use a non-stick skillet.  Either melt butter in the skillet or spray pam which ever you prefer.  Your burner should be on medium heat and place the quart jar lids (or whatever you are using) in the skillet I can cook 3 eggs at a time in my skillet.   Then crack 1 egg into each lid and salt and pepper the eggs at this point.  Now place 1 or 2 ice cubes in the skillet and put a lid on top of the skillet.  When the ice cubes have melted and the water is bubbling you can turn off the burner.  It should take 3-5 minutes for the eggs to cook.

Toast the English muffins and butter them.

Take the eggs out of the rings (you may have to use a butter knife or a fork to pry the egg out.)

Now you can make your sausage egg mcmffin!

 Here's how I layer it:
English muffin bottom
half a slice of cheese
sausage
egg
half slice of cheese
English muffin top

Now enjoy!!


Wednesday, September 7, 2011

Red Velvet Cupcakes...mmmmm

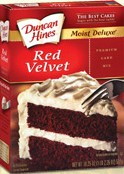
My hubby had his big 30th Birthday over the weekend!  I decided to make him Red Velvet cupcakes, and I have to say they turned out delicioso!   You have to know I believe in using box cake mix (which I usually modify) as long as you make homemade frosting.  I don't like store bought frosting I think it's nasty!  Homemade is the only way to go when it comes to frosting!  With that said here is the recipe I used!
1 box Red Velevet cake mix
1 small box Chocolate instant jello pudding pie filling
4 Eggs
1/2 c Vegetable oil 
1 1/3 c Water

Mix all ingredients for about 3 mins or until smooth.
Then pour into your pre-lined cupcake pans.  Makes about 24 cupcakes.  Follow cooking instructions on back of the cake box mix.

Then the frosting I don't exactly have a precise recipe I kind of just threw stuff together, but here is the idea.
1 8 oz. Package of cream cheese
1 stick of softened  Butter
1 1/2 tsp Vanilla
About 1/2 of Heavy Whipping cream  give or take.
1/8-1/4 tsp Salt
2-4 cups of Powered Sugar

You don't need to soften the cream cheese, you want the frosting to be cold.
Mix the cream cheese and butter together until fluffy which takes about 3 to 5 mins in my kitchen aid. Add in the vanilla and mix again.
Then add 2 cups of sugar and mix.  Now the frosting should be pretty thick so start adding in the heavy whipping cream.  You don't want he frosting to be too runny so add just a bit at a time.  If it gets to runny just add more sugar, it will help thicken it up.  Now you can decided how sweet and the exact texture you want. 
                                     
Good Luck and Enjoy!!

Thursday, September 1, 2011

Your Food Reviewed

Ok so I  started this blog as a place for all types of reviews, but only posted a few things.   Most of what I post is about food.  I asked myself why not start a food blog?  I LOVE food!  Sometimes I feel like food is my life!  It's what really makes me happy.  I can be in a terrible mood, then sit down and eat something...anything and I immediately feel better...I mean immediately!  Some people might call that an addiction, I call it happiness haha.  Anyway I have now started a food blog.  I consider myself a pretty darn good cook ...when I want to be.  I want so share my know-how of food with you.   I hope you enjoy!